Docker is a set of platform as a service products that use OS-level virtualization to deliver software in packages called containers. The service has both free and premium tiers. The software that hosts the containers is called Docker Engine. It was first started in 2013 and is developed by Docker, Inc.
- Wikipedia
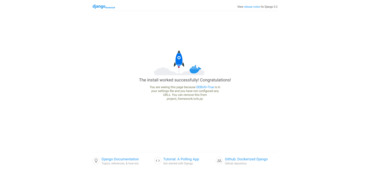
If you're looking to get started with Django and Docker, then this guide is for you! In this article, I'll show you how to install Django with Docker by using the Dockerized-Django project. This approach makes it easy to get up and running with Django on a development or production environment, without having to setup all the things each and every time. You can save your valuable time by using the repository as a base for your project.

Dockerized-Django is a custom built project that is a collection of pre-configured Docker images with Docker compose file which means you can just pull the docker images down and start developing. If you don't already know about Docker or Docker Compose then I recommend that you start there and then come back here to learn the rest. For this article, I'm assuming you have a basic understanding of both Docker and Docker Compose, so feel free to skip ahead to the section.
Pre-configured with:
Dockerized-Django currently pre-configured with:
- Django - 3.2 LTS
- PostgreSQL - Latest
- Adminer - For managing the database
- Nginx - Web server in production
Why Dockerized Django?
- Dockerized: Preconfigured with Docker and Docker Compose.
- Environment Variables: environ package is used to set environment variables and you can set environment variables in .env file.
- Settings Module: Used different settings file for development and production with a base settings file.
- Settings Variables: Moved commonly used variables to .env file.
- Django Logging: Django logging with rotated file handler.
- Auto Exception Logging: Auto exception logging using rotating file handler.
- Production Ready: Production ready with nginx and gunicorn.
- Django Debug Toolbar: Django debug toolbar configured.
- And more.
Steps To Follow To Set Up Dockerized-Django:
- Install Docker and Docker Compose if they aren't already on your machine.
- Clone the repository by running the following command:
git clone https://github.com/insafm/dockerized-django.git - Go into the newly cloned directory:
cd dockerized-django - Take a look at all the files in the project and go through "docker-compose.dev.yml " file to make sure everything is configured properly. Also pay close attention to what services each container is mapped to and make sure those are correct for your environment. For example, if you've to run other servcies besides Django in your development environment, you've to add those services aswell or if you're using a different database, you've to make sure the database service is set up. You can edit this file in the editor of your choice.
- Run the application using the command below:
- To run development environment:
docker-compose -f docker-compose.dev.yml up - To build and run development environment:
docker-compose -f docker-compose.dev.yml up --build -d
- To run development environment:
- You will get more updated commands and instructions from github repository. Don't forget to star it if this is helpful for you.
Happy coding! If you would like to share anything with me please comment below.
Comments...
No comments found. Leave your reply here.